| The Great Witch |
Transcript |
| Storyteller |
| Indeed. A conclusion that requires a climax of epic proportions. The identity of the Great Witch Bezella is made public... she is tried in the court and finally... destroyed! At last, peace will be restored to the town... The final scenario is close at hand. |
Chapter 3: The Great Witch is the third chapter of Professor Layton vs. Phoenix Wright: Ace Attorney.
Despite being cleared of killing two muggers, Espella Cantabella remains imprisoned on suspicion of being the Great Witch Bezella. Hershel Layton, Phoenix Wright, Luke Triton, and Maya Fey must set out to learn more about this legendary witch in order to clear Cantabella's name.
High Inquisitor Darklaw[]
Hershel Layton, Luke Triton, Phoenix Wright and Maya Fey decided to find out who had given the order to have Espella Cantabella detained on suspicion of being the Great Witch Bezella. They found out about High Inquisitor Darklaw and went to the Inquisitors' Hall to see her. They arrived just as Zacharias Barnham was finishing a conversation about Cantabella with her. He was to handle the questioning, and left to do so.
The four asked Darklaw about Cantabella and Bezella. Darklaw would not tell them much, but it seemed that she had at least one reason for suspecting Cantabella. Darklaw warned them that their support for Cantabella would draw suspicion from the townsfolk. The four decided to visit Cantabella the next day, and headed outside. At the court entrance, they had a run-in with Barnham's dog Constantine, who bit Wright before running away.
| Puzzle #24: Pretty Posey For more information, see the Professor Layton Wiki | ||
|---|---|---|
| Acquisition: |
Search the leaves of the rightmost tree in the Road to the court. Muffet is looking for flowers to give to Inquisitor Barnham. | |
| Picarats: |
30 | |
| Notes: |
N/A | |
They made it back to the bakery, where Patty Eclaire was waiting for them. She had watched the trial and thanked them for saving Cantabella. The four then turned in for the night. However, Triton and Fey woke up and talked with each other. Triton assured Fey that even if her memories of Eclaire weren't real, the feelings still were. They then heard Eclaire outside, looking for Cantabella's cat Eve, who had run away. The two decided to find her.
Looking for Eve[]
Triton and Fey found Lettie Mailer at North Parade Avenue. She had forgotten the route that she was supposed to take to deliver her letters. Fey and Triton helped Mailer figure out what the route was supposed to be.
| Puzzle #25: Puppy Postal Patrol For more information, see the Professor Layton Wiki | ||
|---|---|---|
| Acquisition: |
Required | |
| Picarats: |
40 | |
| Notes: |
| |
Triton and Fey found Price at the W. Shopping Area. He could not remember whether he had seen Eve because he had his own issues. He had a mouse problem, and Fey and Triton helped him sort out the good mice from the bad ones.
| Puzzle #26: Mousequerade For more information, see the Professor Layton Wiki | ||
|---|---|---|
| Acquisition: |
Required | |
| Picarats: |
30 | |
| Notes: |
| |
Both Mailer and Price remembered that they had heard Bardly singing about Eve at the Town Centre. They went to talk to him, but he was busy bemoaning the appearance of a rival bard. They helped him solve a puzzle to make him feel better.
| Puzzle #27: Stained Glass For more information, see the Professor Layton Wiki | ||
|---|---|---|
| Acquisition: |
Required | |
| Picarats: |
30 | |
| Notes: |
N/A | |
Bardly told them that Eve had evaded some knights at the main street. Triton and Fey went there to find four knights looking for a cat. The knights recognized them from the trial, and were reluctant to give them any information.
| Puzzle #28: An Evening Stroll For more information, see the Professor Layton Wiki | ||
|---|---|---|
| Acquisition: |
Required | |
| Picarats: |
20 | |
| Notes: |
| |
However, with the clues that the knights had discussed, the two were able to deduce that Eve had escaped to the town square. They headed there to find High Inquisitor Darklaw. Apparently, she was heading an investigation into the murder of an alchemist, which had occurred three months ago and was the only case in Labyrinthia that had never been solved. Darklaw had not seen Eve, but she cryptically told Fey that there were witches in the most unlikely of places, and to remain vigilant. Triton found Eve in the outskirts and the two headed back to the bakery.
| Puzzle #29: Wagon Draggin' For more information, see the Professor Layton Wiki | ||
|---|---|---|
| Acquisition: |
Talk to Constantine at the Great Archive Entrance. Upon seeing each other, Eve and Constantine start to act unfriendly toward each other. Luke Triton has them participate in a puzzle to solve so that they can be friends. | |
| Picarats: |
25 | |
| Notes: |
N/A | |
Visiting Espella Cantabella[]
By the time that Luke Triton and Maya Fey had returned to the bakery, the sun was already rising, and Phoenix Wright, Hershel Layton and Patty Eclaire were waiting for them. Triton and Fey explained that they had been looking for Eve, and promised never to go out like that again. The team then headed for the courthouse to talk to Espella Cantabella.
| Puzzle #30: Gabbin' Goats For more information, see the Professor Layton Wiki | ||
|---|---|---|
| Acquisition: |
Talk to Mary at the East Shopping Area. | |
| Picarats: |
50 | |
| Notes: |
| |
When they got to the courthouse, a nearby knight told Layton that the Storyteller had requested his presence in the Audience Room as soon as possible. While Layton and Triton headed there, Wright and Fey went to the Deathknell Dungeon to see Cantabella. They assured her that they would not abandon her, because even if they drew suspicion from the townspeople, they were already suffering seeing her in prison. They asked her why the townsfolk suspected her.
Heading to the Audience Room[]
| Puzzle #31: Animal Pens For more information, see the Professor Layton Wiki | ||
|---|---|---|
| Acquisition: |
Talk to Old Rootie in the main street. | |
| Picarats: |
30 | |
| Notes: |
N/A | |
Meanwhile, Hershel Layton and Luke Triton headed to the guarded gate. They asked the guard there to let them through, but the gate was broken. The guard said that there was a knight with an unusual sword who knew how to fix the gate.
| Puzzle #32: Not Standard Issue For more information, see the Professor Layton Wiki | ||
|---|---|---|
| Acquisition: |
Required | |
| Picarats: |
25 | |
| Notes: |
| |
Layton went to fetch this knight, then headed through the now-fixed gate to the knights' garrison. There, they saw a man named Cutter being accused of a series of thefts. Cutter insisted that he was innocent, and that he had even set up a street patrol with other townsfolk to catch the thief. Layton was able to show how Cutter had done this, clearing his name.
| Puzzle #33: Street Patrol For more information, see the Professor Layton Wiki | ||
|---|---|---|
| Acquisition: |
Required | |
| Picarats: |
40 | |
| Notes: |
N/A | |
| Puzzle #34: Chess Skirmish For more information, see the Professor Layton Wiki | ||
|---|---|---|
| Acquisition: |
Talk to the knight who is off by himself in the knights' garrison. He is doing mind training with a puzzle, but he has struggled with it for the past three days. | |
| Picarats: |
20 | |
| Notes: |
N/A | |
| Puzzle #35: Mouse Mayhem For more information, see the Professor Layton Wiki | ||
|---|---|---|
| Acquisition: |
Examine the leftmost tower's spire in the knights' garrison. | |
| Picarats: |
25 | |
| Notes: |
N/A | |
Layton and Triton arrived at the Audience Room Entrance. The door was locked with a puzzle, perhaps as a test.
| Puzzle #37: Rotating Room 2 For more information, see the Professor Layton Wiki | ||
|---|---|---|
| Acquisition: |
Examine the second spire from the left in the Audience Room Entrance. | |
| Picarats: |
40 | |
| Notes: |
N/A | |
| Puzzle #36: Decipher the Door For more information, see the Professor Layton Wiki | ||
|---|---|---|
| Acquisition: |
Required | |
| Picarats: |
40 | |
| Notes: |
| |
Layton solved the puzzle and arrived at the Audience Room. The Storyteller greeted them, and asked them why they were here. He had not planned the presence of Layton and Triton, and he considered them a corruption in the story. Layton replied that he and Triton had found themselves here inadvertently, causing the Storyteller to recall a similar incident with Carmine Accidenti. The Storyteller informed them that the Story was about to end with the destruction of Bezella.
The Storyteller's daughter[]
Meanwhile, at Deathknell Dungeon, Espella Cantabella told Phoenix Wright and Maya Fey that she was the Storyteller's daughter. People had grown suspicious of her after someone had bumped into her and had later been killed by a witch. She explained that she had originally lived with her father. However, he had steadily grown distant, so five years ago, she had left to live with Patty Eclaire, the only person who had remained kind to her.
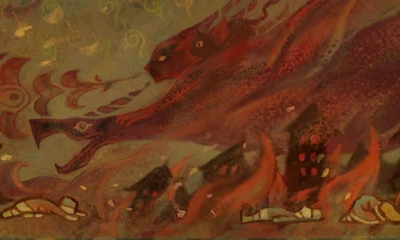
They then started discussing the Great Witch Bezella. They had no leads, and the inquisitors had already solved nearly every case. However, Fey remembered that there was one case that had not been solved. Suddenly, a guard called for Wright and Fey, saying that visiting hours were over. After they left, Cantabella had another flashback of a fiery dragon consuming a town.
The alchemist's house[]
Phoenix Wright and Maya Fey decided to head to the Inquisitors' Hall for more information about the alchemist's death, hoping to find a lead on Bezella. Barnham found them there and, after learning that Darklaw had already told them about the incident, decided to tell them what he knew. Sir Belduke the alchemist had been found dead in his residence, located near the town square. The room had been locked from the outside, and the incident had not been predicted in the Story. Barnham doubted that Wright would find anything that the inquisitors had not, but Wright insisted that it was worth a try.
| Puzzle #38: Stomp on It! For more information, see the Professor Layton Wiki | ||
|---|---|---|
| Acquisition: |
Talk to Dewey inside the Great Archive. His neighbor is making a lot of noise stomping around in his house. | |
| Picarats: |
40 | |
| Notes: |
| |
| Puzzle #39: Train Trouble For more information, see the Professor Layton Wiki | ||
|---|---|---|
| Acquisition: |
Talk to Petal in the West Shopping Area. She is looking for her brother Cecil. Find Cecil in the town square outskirts. Cecil will only go with Wright and Fey if they can solve a puzzle. | |
| Picarats: |
40 | |
| Notes: |
| |
At the town square, the duo found a road leading to the alchemist's house.
| Puzzle #20: Cloud Maze 2 For more information, see the Professor Layton Wiki | ||
|---|---|---|
| Acquisition: |
Talk to Petter in the town square. Wright and Fey tell him that they're planning on giving up baking. Petter admits that he did not like their bread, and prefers his bread light and fluffy. | |
| Picarats: |
50 | |
| Notes: |
N/A | |
At the house, they met Jean Greyerl, Belduke's butler, who was still living there. Greyerl agreed to assist them with their investigation, and took them to the butler's room. The murder had occurred in the alchemist's study, and the crime scene had been preserved. Greyerl also mentioned that, on an evening shortly before his death, a lightning strike had caused a bell tower to appear out of nowhere. Belduke had become seriously agitated after this incident, and the bell tower had been under continuous guard ever since.
The golden curse[]
| The beginning of a new tragedy...or farce. The victim of a golden curse lies in the dwelling of a user of false alchemy. A man from afar falls to a golden curse and a woman from afar cries out in grief. The woman is captured, her dark trial begins, the fiery pit will cleanse all her sins. |
Meanwhile, Hershel Layton and Luke Triton were talking with the Storyteller, who insisted that they could not change the final outcome of the Story. Layton begged to differ, and pointed out that he still had two weeks. The Storyteller, offended by Layton's confidence, told him that the next parade would occur in two days, rather than two weeks. He then wrote a story in which "a man from afar" would fall to a golden curse inside an alchemist's house, and "a woman from afar" would be tried for witchcraft. Layton and Triton realized that he was referring to Phoenix Wright and Maya Fey.
The Storyteller told them that they could not change the outcome, but their efforts would provide drama and excitement for the Story. Triton called him a monster, but Layton told him that they needed to get to Wright and Fey first. As the two hurried back through the knight's garrison, Hoot, the Storyteller's owl, caught up to them. It carried a letter sent by the alchemist Belduke to the Storyteller, except the papers inside contained no writing. Layton realized that this was where the golden curse would occur, and he and Triton took two horses and hurried to the alchemist's house.
Back at the alchemist's house, Wright and Fey noticed that one of the walls of the butler's room was painted green. Apparently, Jean Greyerl had accidentally started a fire, and had painted that wall to cover up the damage. They then decided to investigate the study. There was white powder on the floor, and a painting behind Belduke's desk. The wall behind the painting was painted green. Fey talked with Greyerl again, noticing that the butler wore an amethyst, a gift from Belduke.
Wright asked whether there was any other place that he could investigate, and Greyerl opened the door to the basement study. It was rather cramped, so only Wright went in. Inside, Wright noticed a statue of a goat made entirely of gold. He also found a desk and a well. The desk and goat were the only objects not covered in dust. Wright then decided to head back upstairs.
Layton and Triton made it to the alchemist's house. Layton made it to the study first, and warned Fey that she and Wright were in danger. Just then, the witch from London appeared before them. Layton asked whether she was Bezella, but she told him that he should be more worried about himself.
Meanwhile, Triton also tried to enter the house, only to be impeded by a woman named Primstone and Bardly's rival, Birdly. Triton told them that it was a matter of life and death, and they and a nearby Emeer hurried toward the study. They heard someone yelling, "Goldor!" followed by Fey's scream. As they entered the study, they saw that Layton had turned into a golden statue, which fell to the floor, breaking off his outstretched arm. A Talea Magica also fell to the floor, and Fey insisted that she was not the culprit. Wright also emerged from the basement and saw the terrifying scene.
References to other cases[]
- When talking to Price for Puzzle 26: Mousequerade, Maya Fey says, "Oh...are you talking about a puzzle? Becaaaaause I could totally solve it for you. ZVARRI! Just like that! [...] Okay, Luke. We can do this, can't we? ZVARRI! Just like that!" "Zvarri!" was the catchphrase of the self-styled "Ace Detective" Luke Atmey, who appeared in The Stolen Turnabout.
- Upon meeting Jean Greyerl, Fey will exclaim: "Wow, a butler, this is my first time meeting a real one." This may be a subtle reference to Farewell, My Turnabout, where Fey was kidnapped and held hostage by an assassin posing as a butler named "John Doe".
- While admiring the picture in the alchemist's study, Fey states that they could use a similar one back at Wright's office and that they could hang it next to the potted plant Charley.
Cultural references[]
- When Fey solves a puzzle, she will comment: "Leave it to your friendly neighbourhood spirit medium!" This is a reference to the comic book superhero Spider-Man, who often refers to himself as "your friendly neighbourhood Spider-Man".
- A knight guarding the entrance to the knights' garrison tells Layton that "One does not simply... visit the Storyteller." This may be a reference to a line spoken by Boromir ("One does not simply walk into Mordor") from J. R. R. Tolkien's fantasy novel The Fellowship of the Ring, which is the first part of his trilogy The Lord of the Rings. After the 2001 film adaptation, the line "One does not simply walk into Mordor" became an internet meme.
Other languages[]
- French - La Grande Sorcière (lit. "The Great Witch")
- German - Die große Hexe (lit. "The Great Witch")
- Italian - La Grande Strega (lit. "The Great Witch")